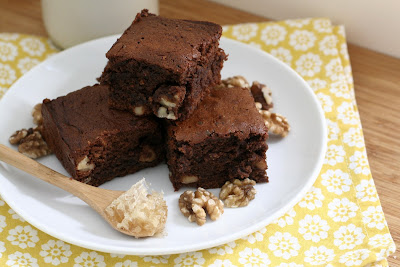
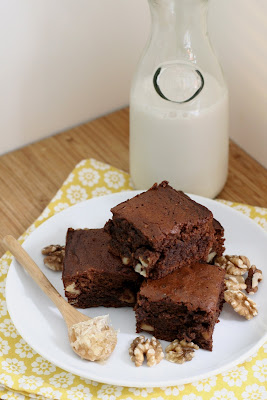
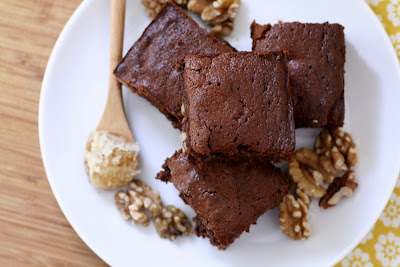
I have been a major slack-a-saurus with my Tuesdays with Dorie baking. I think I just got burnt out on all the sugar. Then I saw the words “honey nut brownies” and stopped in my tracks. I had to make them. Love me some honey!
Here’s what you need to know about these brownies:
-they’re sweetened with (mostly) honey. there’s a little white sugar as well, but i think i would leave it out next time, they’re plenty sweet with the honey alone.
-they are cake-like brownies, if you’re into that kind of thing.
-i easily subbed whole wheat pastry flour (Bob’s Red Mill!) for the white flour with no problems.
-you should use good honey for these. by good honey, i mean honey that tastes good to you- doesn’t have to be expensive. i used Trader Joe’s Desert Mesquite Honey for these, but i also love Savannah Bee (really love).
Try these if you’re looking for a little something different in the brownie department.
You guys have been amazing lately. Thank you for your help this week with Operation Layla, it was a huge success.
I’m sure by now, you’re aware of all that’s going on in Japan. For me, it didn’t hit home until yesterday. A woman at my MOPS group spoke about her family in Japan. The word heartbreaking doesn’t even describe it.. we need to do anything and everything we can to help.
We had a big day this weekend. A big first birthday!
I decided months ago that I wanted to plan a little gentleman’s theme for Elliott’s first birthday. Let’s just face it- there’s nothing cuter than a baby with a bow tie.
Or a mustache! See?
Adorable.Before I did any major party planning or decision making (I am notorious for last minute party decisions), I started out with this invitation:
After a little shopping, I decided to add some blue to the color scheme and found the perfect argyle fabric (at Hobby Lobby) on the table below. As far as food goes, I tried to keep the spread half-healthy to counteract the cupcakes. Here’s what was on our menu for the day:
I couldn’t get off my orange-themed food kick, so I also filled mason jars with a little kid-friendly birthday punch (orange, pineapple and pear juice with seltzer water) and put them on ice in big metal tubs- but they were gone before I could get a photo for you. All that was left was a few paper straws.
We didn’t need too many activities with all the cute babies to chase after, but we did put together a little photo booth area so the adults could get their mustache on, too.
The last bit of decor was a hanging display of Elliott’s weekly photos. It was fun for everyone to see how he’s grown over the year and leave him birthday wishes.
For a little take-home favor, I made mustache sugar cookies and flooded them with orange royal icing (with the late-night help of my amazing family). This is one of my favorite party details. I just loved how they came together!
I couldn’t have asked for a more beautiful day, better friends or a better party for my little guy. God has just been pouring out the blessings on our family this year. Happy birthday, Elliott- here’s to an exciting year two!
This weekend, my sweet and generous friend Jess asked me and lots of fellow bloggers to participate in an online bake sale to benefit Operation Layla. Layla has an amazing story and needs our help NOW. I don’t know Layla personally, but this is her story (via Jesstagirl and her Officer):
One month after her 30th birthday, Layla was diagnosed with early stage cervical cancer (1A Adenocarcinoma). She was extraordinarily lucky that it was caught early, and had a simple surgery to remove the cancerous cells.
Three years later, Layla was in horrible pain that affected nearly every aspect of her life. Temporarily uninsured due to a job change, she paid out of pocket last October to go to the doctor and make sure the cancer had not returned. Thankfully, it had not. However, her doctor believes that she has pelvic adhesions and Endometriosis due to the previous surgery, but it can’t be diagnosed until an additional surgery (laparoscopy) is performed. The doctor also found out Layla has cervical stenosis, which basically means her cervix has completely shut down due to the scar tissue from the previous surgery. These issues make her miserable most of the time, making simple things like going to the bathroom and menstruation horribly painful, and sexual intercourse impossible. He stated that if she wanted to have children one day, even sperm could not pass through her cervix, and she would have to have intrauterine insemination.
The doctor wanted to schedule surgery as soon as the insurance at her new job went into effect. Her company fired her the day her insurance became valid, ten days before Christmas, plainly stating that it was because of her health issues.
Fortunately, she got on her husband’s insurance, which went into effect February 1st. As soon as she could, Layla scheduled surgery for March 22nd. Then her insurance company dropped a bomb: because she went to the doctor (even as a self-pay patient) within a three month period prior to her enrollment date, they were considering her health issues to be a pre-existing condition, and would not insure any doctor visits, medication, or surgery for 388 days.
When you are in near constant pain and can’t work, 388 days is a long time to wait. The sooner Layla can have this surgery, the sooner she can return to work (hopefully with a nicer company!) and start living her life again. Her doctor has been nice enough to work out a deal with her if she can pay as a cash patient: he decreased the amount of her surgery to $4,000, and the cost of the anesthesia to $500, with additional fees for biopsies of removed tissue to be determined.
The problem is, Layla is unemployed due to this, has used her savings to pay for living expenses and medical bills, and has been denied loans for the surgery because of her unemployment status. She does not have close family, so she can’t ask them for help. Surgery is scheduled for March 22nd, and Layla and her husband are still trying to secure a loan through several banks.
March 22 is just one week away. The girls at Operation Layla have organized a virtual bake sale to raise Layla’s surgery funds. Please consider giving to this cause! The online bake sale opens tomorrow, March 16 from 8am EST to 11pm EST. Minimum bids are $15, and you actually get the baked goods sent to you by mail! Oven Love will be donating a fresh batch of Snickerdoodle Blondies, and they’ll be accompanied by lots of other mouth-watering treats.
For more details on the sale itself or how to donate, visit Operation Layla. Thanks in advance- I know you’ll come through!
It’s March! That means it’s Brunch month in my Great Food Adventure. To tell you the truth, I’m relieved. Those macarons last month were giving me drama.
I think brunch is one of the greatest ideas ever. I only wish I could enjoy it more! I’m always ravenous in the morning and the bean never sleeps in, so our morning meal usually happens around 7am. But I do love the idea of having a beautiful spread of breakfast and lunch options, lots of eggs, beautiful fruits and veggies, pastries and carbs galore!
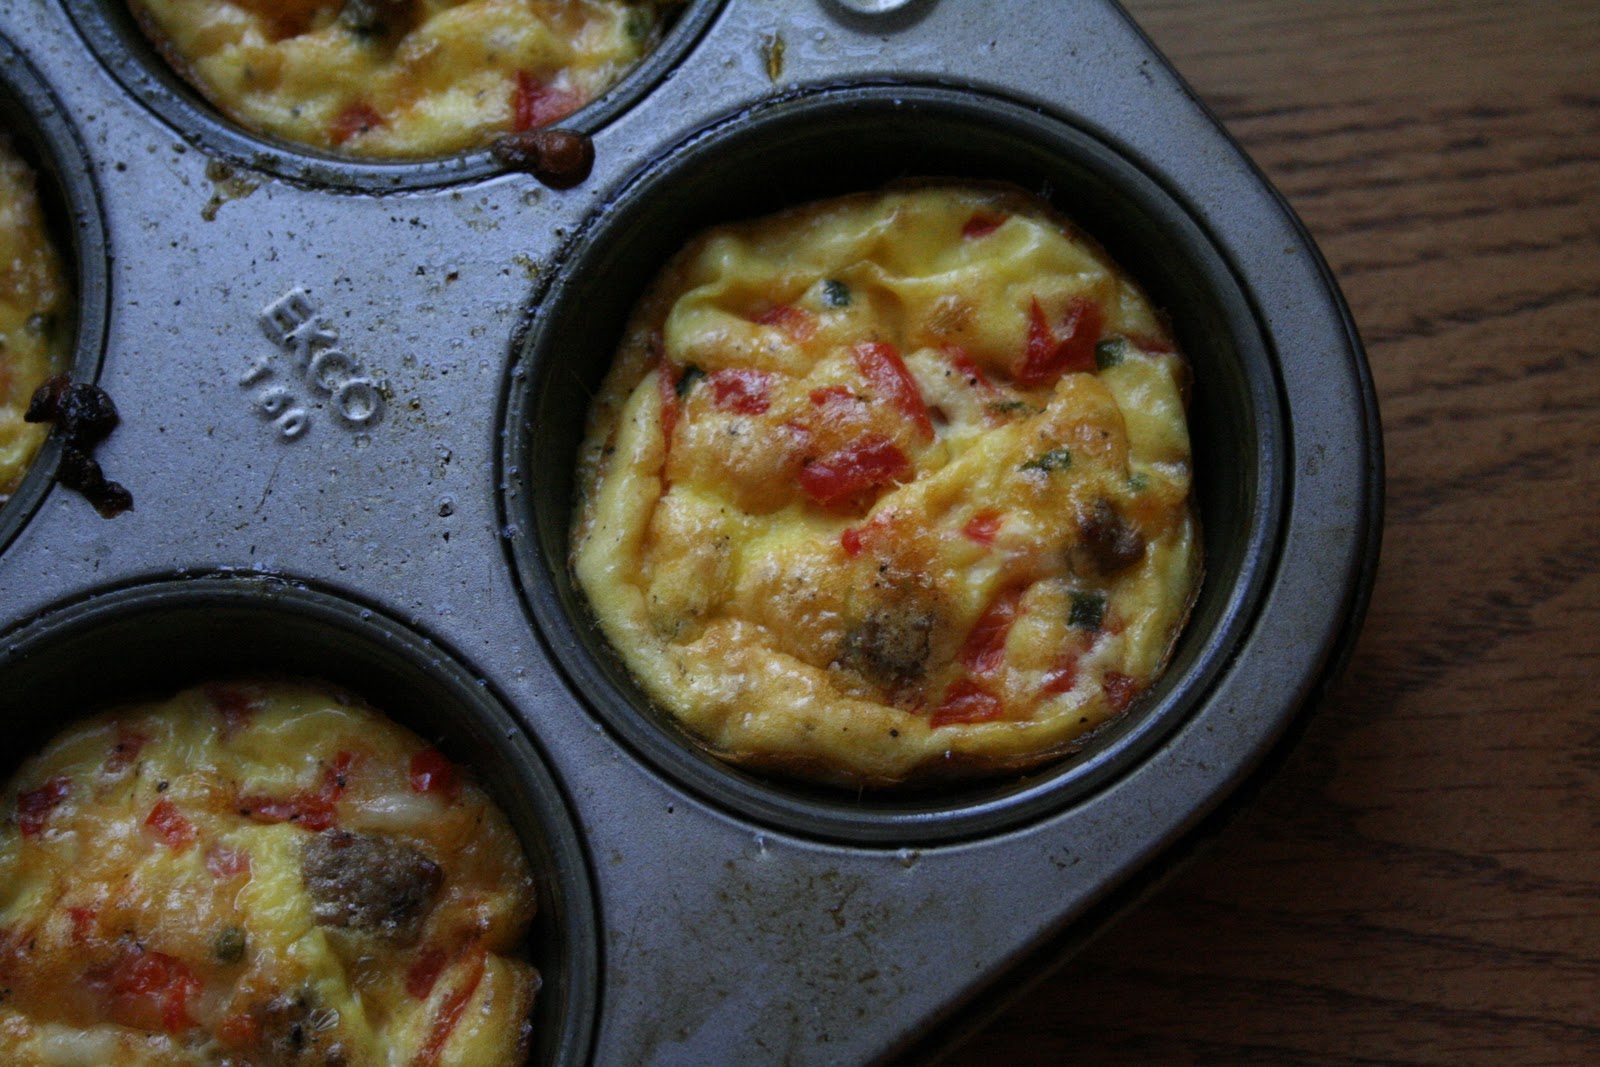
Here’s my first brunch offering for you- mini frittatas. These are great for a brunch spread- individually sized and protein-packed. A perfect way to start the day and a nice foil for all of the usual brunch sweets. The preparation is simple- saute the veggies, whisk up the eggs and milk, combine and bake. Brunch in a snap.
I am pumped about all the eggs I’ll be consuming this month. Love me some brunch!
What’s your favorite brunch food?
Are there any brunch recipes you’ve been dying to find?
Preheat the oven to 375°:. In a small skillet, heat the butter over medium heat. Add the onion and bell pepper and cook until softened, about 7 minutes. Season with salt and pepper and stir in the ham/sausage and chives. Let cool, then add the cheese and set aside.
Using an electric mixer, beat the eggs and milk until frothy; season with salt and pepper.
Spray 2-3 muffin tins (depending on the size) with cooking spray. Divide the meat and veggie mixture evenly among the muffin tins and sprinkle each with a pinch crushed red pepper. Ladle the egg mixture to about ½ inch from the top of the tin. Bake until puffy and golden, about 30 minutes. Serve immediately.
After my dismal/embarrassing first try at macarons earlier this month, I picked up my spatula and gave it another go. I will not be defeated by a cookie.
I wasn’t sure where to go from the first recipe, but I wanted to make something green for St. Pat’s. Since I already hit you with my Shamrock Shake obsession last week, I held back on the ShamShake macs (in my mental filing cabinet for next year) and decided on mint chocolate. Would you believe a recipe already existed? I love when that happens.
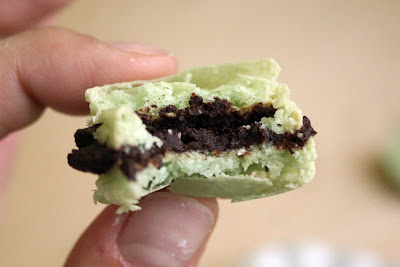
I used Not So Humble Pie‘s recipe again, but this time I used the French method, which I think was easier- no cooking sugar/egg on the stove this time. I am much happier with the results visually this time! They actually look like macarons. They’re more uniform and they rose up nicely with nice feet. Don’t go thinking I perfected it, though. Take a look inside:
See the big air pocket and thin outer crust? I think I over-mixed or under-baked. Still not completely sure. Another shot of the easily broken shells:
Though I still don’t feel entirely confident with macarons, I think I’ll be retiring from them for a little while. It was more of a challenge than anything to me. They are too sweet and too tempting to have around all the time while experimenting. If someone requests them of me in the future, I’ll gladly give them another try, but for now, I’m satisfied with how this batch came out (visually, at least) and I can move on to other (healthier!) things.
Are you a cereal person? I love it. Growing up, cereal and oatmeal were essentials at our house (“Breakfast is the most important meal of the day, Natalie.” Ahem.) I never got the sugary good stuff, though. Mom and Dad were not about to let that happen. Sugar and I were (are) a crazy combo. I had dreams about Lucky the Leprechaun and his marshmallow goodness.
Now that I’m grown, I recognize the logic and don’t buy anything “magically delicious.” There are too many artificial ingredients and I just can’t justify them as foods worth having around. Enter Three Sisters Cereal– sold exclusively at Whole Foods– a company providing sweet morning treats with a conscience.
Three Sisters has taken all of our favorite sweet cereals- like Lucky Things and Cinnamon Toast Stuff- and made whole grain, all-natural versions. Is that not the coolest thing ever? They also have a neat little line of oatmeal. And they power their business with wind energy. So stinkin’ cool.
Now, don’t get me wrong, these cereals are still sweet. You can’t substitute these for bran flakes and expect weight-loss miracles. But, if you’re looking for something sweet in your cereal bowl anyway, you should ditch the fake ingredients and HFCS and try Three Sisters.
I was going to try some fun recipes with the cereal, really- I had the best intentions. Unfortunately, I ate it all and have no recipes to show for it. But I can tell you it’s delicious. And I can do you one better- free cereal for a month.
Giveaway is closed.
The cereals and oatmeal were so good. I loved the Dark Chocolate Oatmeal- it’s great with a banana or as a little snack in the evening. Loved it all. Thanks, Three Sisters, for giving me a taste. Here’s hoping you’ll get a taste, too!
I am a granola person. It’s just how I roll. Not only that, but I’m a picky granola person. I like my granola just so. And maybe that’s why I’ve waited so long to make it for myself. I wouldn’t want to force down a batch of bad granola.. yuck.
This granola is my jam!
I’ll eat granola in just about any way- alone, with milk, with yogurt, in a banana wrap (we’ve discussed these, no?), in a cupcake (comment if you want me to post that recipe!), whatevs. I love it. My baby is super jealous of my granola-eating because it’s one of the things he just can’t have yet- it’s full of deliciously nutty nuts, chewy (chokeable) fruit and crunchy oats. Certainly not baby-friendly, but definitely mommy-friendly.
I like this particular recipe for its heathfulness. It uses applesauce and honey for sweetness and is just swimming with flax seeds, nuts and fruit. I can’t wait to make another batch and try out other flavor combinations. I’m thinking chocolate coconut.. or something with macadamia nut.. yum.
If you make your own granola, does that officially make you ‘Granola?’
adapted Chocolate and Carrots (http://chocolateandcarrots.com/2011/01/homemade-granola) and Gourmande in the Kitchen (http://gourmandeinthekitchen.com/?p=953)
Author: Oven Love
Recipe type: Breakfast
Serves: 8
Ingredients
2½ cups old-fashioned oats
2½ cups quick cooking oats
1½ cups puffed rice cereal (wheat works, too)
1½ teaspoons ground cinnamon
1 teaspoon salt
¾ cup natural unsweetened apple sauce (I made my own here by simmering a peeled, chopped apple in an inch of water until soft, draining the apples and then pureeing until smooth)
½ cup honey
½ cup light brown sugar or maple syrup
2 tablespoons coconut oil
2 teaspoons vanilla extract
2½ cups chopped raw mixed nuts (by “mixed,” I just mean a variety. I used a mix of cashews, almonds, pecans and walnuts)
½ cup flaxseeds (this is a lot of flaxseeds! if you’re not used to them, reduce by half or more)
2 cups dried fruit (I used a mix of black raisins, golden raisins and dried cranberries)
Instructions
Place two oven racks on the top and bottom ⅓ of the oven.
Preheat the oven to 300°.
Set aside two baking sheets with sides lined with a silpat liner, parchment paper or aluminum foil.
In a large bowl, combine both oats, puffed wheat, cinnamon and salt.
In a separate bowl, combine the apple sauce, honey, brown sugar or maple syrup, coconut oil and vanilla extract.
Stir the wet ingredients into the dry ingredients.
Pour the granola on the baking sheets, splitting evenly between the two baking sheets.
With your hand, squeeze or pinch the oats together into small/medium clumps leaving space on the baking sheet between the clumps.
Place the baking sheets in the oven for 20 minutes (one on the top, one on the bottom).
While that is in the oven, chop your nuts and combine them in a bowl and set aside.
With a large spatula flip over the granola and add the nuts to the baking sheet.
Bake for another 20-30 minutes, until completely dry and golden brown. (The dry part is important! You don’t want soggy granola- it won’t store well or last long.)
Let the granola cool completely on the baking sheets.
Once cool, add in the dried fruit.
Store in airtight containers (I recommend glass, like large mason jars) and enjoy.
Remember Monday? When I couldn’t deliver my Valentine’s Day gift to you?
So lame. You deserve better.
You deserve strawberry ice cream.
Can we still be valentines?
Good. Moving on.
You know what’s even better than making this ice cream for your sweetheart on VDay? Making it for them a week later. Then, not only do they know you love them, but they know you still love them, a week later! Excellent logic.
If you’ve ever made ice cream at home, this will be simple for you. If you haven’t, come to my house and I’ll teach you. You’ll need an ice cream maker and some gumption.
It’s a basic vanilla base, with strawberry puree added in just before processing. The hardest part is making sure you don’t curdle the eggs- correct tempering takes care of that. Tempering means slowly adding a hot liquid to a cooler one, to bring them to the same ‘temper’-ature. Get it?
This would be such a sweet treat to enjoy on a beautiful day like today.
Sweet, strawberry goodness.
Tell your sweetheart you love them again. It never gets old.
(Then come to my house and eat strawberry ice cream.)
adapted from Tyler Florence- http://www.foodnetwork.com/recipes/tyler-florence/vanilla-bean-ice-cream-base-recipe/index.html
Author: Oven Love
Recipe type: Dessert
Serves: 6
Ingredients
2½ cups heavy cream
1¼ cups whole milk
pinch salt
¾ cup sugar
½ vanilla bean
6 large egg yolks
1 cup strawberry puree, cold*
Instructions
Combine the cream, milk, salt, and ½ cup of the sugar in a large pot. Split the ½ vanilla bean down the middle lengthwise and scrape out the seeds with a paring knife; add them to the pot and toss in the pods for added flavor. Place the cream mixture over medium heat, and bring up to a simmer; stirring with a wooden spoon to dissolve the sugar. Ideally, the temperature should reach 175 degrees F (just below scalding) for a smooth-textured ice cream; this should take about 15 minutes. Shut off the heat, cover the pot, and allow the cream mixture to steep for 15 minutes to further infuse the vanilla flavor.
In the meantime, combine the egg yolks in a mixing bowl and blend lightly with a wire whisk. Gradually add the remaining sugar and continue to whisk until the sugar is completely dissolved and the eggs are thick and pale yellow; about 5 minutes.
Using a large ladle or measuring cup, temper the eggs by gradually whisking in half of the hot cream mixture. Return this back to the rest of the cream in the saucepan and turn the heat to medium-low. Stir constantly until the custard thickens and leaves a path on the back of a spoon when you run your finger across it, about 10 to 12 minutes. Do not let it boil.
Pour the custard through a fine strainer into a bowl and chill completely in an ice bath or in the fridge. Ideally, let the ice cream base “age” overnight in the refrigerator before churning in an ice cream maker, but just make sure the base is cold. Before processing, stir in the cold strawberry puree. Process in an ice cream maker and enjoy.
*To make strawberry puree using frozen strawberries: Put frozen strawberries in a strainer over a bowl to thaw, letting the liquids drain. Process in a blender or food processor and strain again. Let chill before adding to the ice cream base. (You can do the same with fresh strawberries, there’s just no draining involved.)
I did make you some delicious strawberry ice cream, but I can’t download the pictures at my current location, so you’ll just have to wait in anticipation for your V-Day gift. I do love you, though, so I’m going to share some of my favorite treats from around the web.
Milk Street on Instagram: "This bright red chicken and orzo soup gets rich, Turkish-inspired flavor from a few simple ingredients: tomato paste, garlic, sweet paprika, and a touch of dried mint. A simple, warming balance of spice, savoriness, and herbs. Best enjoyed with crusty bread. Get the recipe for Chicken and Orzo Soup With Garlic and Paprika via our link in bio. Photography: @cbcreativesphoto Food Styling: @tobinfood #milkstreet #milkstreetrecipes #chicken #chickenrecipes #or


