Honey Whole Wheat Dinner Rolls


- ¼ cup very warm (not hot) water
- 1 Tbsp active dry yeast
- ½ tsp honey or sugar
- 2 cups filtered hot water (not boiling)
- ⅓ cup melted butter or coconut oil
- ½ cup honey
- 2 tsp sea salt
- 7-9 cups whole grain flour (Whole wheat, kamut, spelt, etc. With wheat, you’ll need a little less flour, so don’t put it all in at once.)
- Proof the yeast, by mixing the ¼ cup warm water, yeast and ½ tsp honey/sugar in a small bowl. Let it sit for 5 minutes while you move on to the next step.
- In a large mixing bowl, combine 2 cups hot water, melted butter/coconut oil, honey and salt. Then add 3 cups of the flour and mix well. Lastly, add the yeast mixture and mix well again.
- Add some more of the remaining flour, until dough is thick enough to turn out onto a well-floured surface. Begin kneading, using more of the remaining flour as needed to keep it from sticking. Knead for about 10-15 minutes, until the dough is smooth and begins to resist your kneading (a test is this– if you push the dough in with your fist or finger, it will begin to spring back out at you).
- First rise. Lightly grease a large bowl (I usually use extra virgin olive oil), shape dough into nice ball and turn it a few times in the bowl, to cover it with oil. Let it sit there, covered with a cloth, in a warm place until it doubles in size. Usually takes about 1 to 1½ hours, but it’s fine if it takes longer.
- Second rise. Punch the dough down gently, turn it around and re-shape into a ball, then put it back in the bowl and cover it with the cloth. Allow it to rise again until doubled, about 45-60 minutes.
- Punch dough down gently once again, then take out and place on counter (with flour under it) and cover with a cloth. Let it sit for 10-15 minutes. Meanwhile, prepare your pan by greasing it (a 8×8 square pan works well, but you can also use a 9×13). I like to save my butter wrappers in the fridge to use for greasing baking pans.
- Shape the buns. First, divide the dough in half. Each half will make about 1 dozen buns, depending how big you make them. Smooth your dough and turn begin to pinch off small pieces of dough, about the size of a mandarin orange. Literally push the dough between your forefinger and thumb, closing your fingers until the dough is actually pinched right off of the larger piece. Continue to do this until you fill your pan.
- Cover pan with a cloth and allow to rise again, until buns are just a little bit smaller than desired size (remember that they will rise again slightly with the heat of the oven). I will let mine sit anywhere from 10 minutes to another 30-40 minutes.
- Bake at 350 for 25-30 minutes, until just golden on the top. Remove from oven and flip buns onto wire racks to cool.
- Another option if you don’t need that many rolls for your dinner is to make only half of the recipe into buns. The other half can be made exactly the same but shaped into a bread loaf and baked for 35-45 minutes instead. You can also use it as a pizza crust (see the Saving Naturally post for baking details.)
Make-Ahead Mango & Raspberry Margaritas


- 1 mango, cored, peeled and chopped
- 1 12 oz. can of frozen limeade concentrate
- 1 cup tequila
- ¼ cup triple sec
- juice of 1 lime
- 3-5 cups ice
- lime slices and coarse salt, for serving
- Combine chopped mango, limeade concentrate, tequila, triple sec and lime juice in a blender. Blend until smooth. Add ice until the blender is full. Blend until smooth.
- Pour into small mason jars, screw on lids and freeze.
- When you’re ready to serve, remove the margaritas from the freezer. If you’re using salt, dip the rim into the salt first, then use a straw or fork to stir up the margarita mixture. Add a lime slice and serve.
- 1 small container of raspberries
- 1 12 oz. can of frozen limeade concentrate
- 1 cup tequila
- ¼ cup triple sec
- juice of 1 lime
- 3-5 cups ice
- lime slices and coarse salt, for serving
- Place raspberries in a blender and process until smooth. Pour mixture through a mesh strainer over a small bowl to remove seeds and return the raspberry puree to the blender. Add limeade concentrate, tequila, triple sec and lime juice and blend until smooth. Add ice until the blender is full, and again blend until smooth.
- Pour into small mason jars, screw on lids and freeze.
- When you’re ready to serve, remove the margaritas from the freezer. If you’re using salt, dip the rim into the salt first, then use a straw or fork to stir up the margarita mixture. Add a lime slice and serve.
On My List: Summer Drinks


Eggs Barbacoa


- 4 tortillas (gluten-free, if necessary)
- 4 eggs
- ½ cup guacamole (Cooking Light used re-fried beans, but I had guac on hand, so I used that instead. Both will work and both will be tasty.)
- 1 cup warm shredded beef (I use my recipe for shredded pork, just substitute a beef roast)
- ½ cup Monterey Jack cheese, shredded
- ½ cup salsa
- ¼ cup chopped scallions
- salt and pepper
- Heat a small skillet over medium heat and a large, flat-bottomed skillet filled ½ full with water over high heat. Bring the water to a boil.
- While water is boiling, crack each egg into a ramekin. Reduce heat in the large skillet until water is just simmering and place the ramekins in the water. Cover and steam for 6-8 minutes, depending on how set you like your eggs (check at 5 minutes).
- While the eggs are cooking, heat the tortillas in the small skillet until browned and slightly crispy. Top each tortilla with 2 tablespoons guacamole, ¼ cup shredded beef and 2 tablespoons Monterey Jack cheese.
- Remove the eggs from the ramekins and drain over a paper towel. Top each tortilla with an egg, 2 tablespoons of salsa, 1 tablespoon of chopped scallions and salt and pepper to taste. Serve hot.
Inside the Oven [No. 3]

- We’re throwing a Cinco de Mayo party this weekend! I can’t wait to cook up a Mexican feast and enjoy it with friends. Smoky pork tacos, guacamole, Mexican brownies, and make-ahead frozen margaritas are on the menu. YUM. (Check out my other Mexican recipes if you’re looking for some inspiration.)

- Potty training has begun! As you can see, we’re doing much better with #1. haha! Anyone have any tips to share? He is doing great when I take him to the potty, but he isn’t telling me on his own too often. It’s a start, though- a few steps closer to only having one baby in diapers!
- We bought a backyard pool this weekend because it’s been crazy hot! Maybe the little guy will learn how to swim this summer, maybe not.. but at least we have a way to stay cool during the long, hot summer.

- This little food market is my favorite recent Pin. Isn’t it the cutest?? It inspired me to get rid of all the hand-me-down plastic junk food we got with our play kitchen and upgrade to more real looking fruits and veggies. Wouldn’t it be great if the kids kept their playthings this organized?
- I did some experimenting with the spent grain from Nick’s latest homebrew this weekend. I created some spent grain pancakes and made some bread, too. The pancakes were yummy, but the bread left something to be desired- it was pretty heavy. I waited almost all day for it to rise and finally just threw it in the oven! I’m hoping to try these spent grain chocolate chip cookies next time.
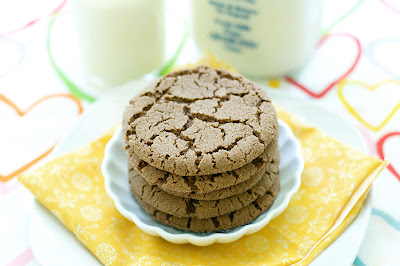
Chocolate Snickerdoodles


- 1¾ cups all-purpose flour
- 1 teaspoon baking soda
- ½ teaspoon baking powder
- Pinch of salt
- 1 stick unsalted butter, softened
- 1½ cups sugar
- 2 ounces unsweetened chocolate, melted and cooled
- 1 large egg
- 1 teaspoon cinnamon
- Preheat the oven to 400°. In a bowl, sift the flour with the baking soda, baking powder and salt. In another bowl, using a handheld electric mixer, beat the butter with 1 cup of the sugar until creamy. Add the melted chocolate and the egg and beat until smooth. Beat in the dry ingredients until incorporated.
- In a shallow bowl, mix the remaining ½ cup of sugar with the cinnamon. Roll the dough into 1-inch balls and roll in the cinnamon sugar. Transfer to 3 parchment paper–lined baking sheets and flatten to 2-inch rounds. Bake for 12 to 14 minutes, until the cookies are puffed and cracked. Transfer to racks and let cool.
Spearmint Iced Tea


- 1 bunch fresh spearmint (I cut 5-6 stalks from my garden, plus more for garnishing)
- 4 family size tea bags
- 1 cup sugar (you can add or reduce the sugar to your liking)
- In a medium saucepan, bring 4 cups of water to boil. When the water is boiling, add the spearmint and tea bags, remove from the heat and steep for 20-30 minutes.
- While the tea is steeping, pour the sugar into a gallon jug (a funnel is helpful if you’re not using a wide pitcher). Cover the sugar with hot water and mix until the sugar dissolves (a cup or two of hot water should be fine). When the tea is done steeping, discard the mint and tea bags and pour the tea concentrate into your gallon container. Add cold water until your container is full. Refrigerate until cold. Serve over ice with a sprig of mint.
Freezer Mashed Potatoes


Freezer Mashed Potatoes
by Oven Love
If you don’t already have a favorite mashed potato recipe, here’s my basic mashed potato procedure: You can make mashed potatoes with any amount of potatoes and whatever you have in your pantry. Start by peeling your potatoes and cutting them into cubes. Pour cold water over them in a stock pot until they are just covered. Add salt and bring to a boil. Boil until the potatoes are fork tender (check them at 10 minutes and then every 5 minutes after until they reach that point). Drain and mash the potatoes. Add your liquid- milk, cream, sour cream, yogurt, stock, etc– and your fat- butter, olive oil, coconut oil, bacon fat, whatever– until you get to your desired consistency. You can also add some cheese- cream cheese, parmesan, goat cheese, brie, cheddar, I could go on– and some seasoning- herbs, minced garlic– make them what you want.
To freeze, let them cool and then freeze flat in zipped freezer bags. Then you’re ready to reheat!
Ingredients
- 1 batch of your favorite mashed potatoes from frozen, thawed (place in the refrigerator the night before for best results)
- 1-2 tablespoons butter, cut into small cubes
- salt and pepper to taste
Directions
- Preheat the oven to 350 degrees.
- Spread the mashed potatoes into a baking dish with a spatula. Dot the top of the potatoes with the cubes of butter and sprinkle with salt and pepper.
- Bake in the oven until butter is melted and the potatoes are just turning golden around the edges (cover with foil if they start browning too quick). Serve warm.
Meet the Chickens


Inside the Oven [No. 2]

- This is a picture of baby girl sleeping on the Strasburg Railroad. We took the kids to ride the train (complete with lunch at the Red Caboose) and they loved it! If you are ever in the Lancaster County, PA area and your kids (or you) love trains, you should really check it out. It makes for a fun day. And stop at The Creamery, too.

- During Easter weekend, my family and I celebrated a little differently this year with a Christian version of the traditional Jewish Seder meal (the Seder plate is pictured above). It was a beautiful reminder of God’s promises and how He has fulfilled them in Christ. (It also reminded me of the wonderful Seder hosted a few years ago by my dear friend Andria, whom I love and miss so very much.) My sister-in-law went above and beyond with the meal and the preparations.. it was a very memorable meal.
- Remember in my last Inside the Oven post where I mentioned my running program? Well, I fell off the wagon on our trip. What do you do to stay motivated to do your workouts (especially when you’re a tired mama)?

- Favorite recent pin? Roasted Peach Lemonade. Sounds amazing! Better believe I will be roasting something soon and turning it into lemonade.
- I just started reading My Life in France by the one-and-only Julia Child. I forgot how much I like reading! Anyone having any good book recommendations? (I have not read The Hunger Games yet. For some reason, I feel that is mandatory to tell people now. Like when you meet people, you should say, “Hi. This is my name. I have/have not read The Hunger Games.“)
- A few women and I shared our testimonies at our MOPS group yesterday and I loved the quote that one of them mentioned. It went something like this- “When you hit rock bottom, it’s because God wants you to know that He is the Rock at the bottom.” I hope that is an encouragement to you today!